

Aadhaar and Passport are the two most widely accepted government-issued IDs in India, recognized across virtually all official processes and services. What makes them uniquely reliable is that generating both requires a person's biometrics, not just fingerprints, but also iris scans, photographs, and digital signatures. This multi-layered verification is what makes these documents a trusted and universally accepted form of identification.
Take a quick look at both documents before we get into each process in detail:
| Parameter | Aadhaar | Passport |
| Issuing Authority | UIDAI | Ministry of External Affairs |
| Primary Purpose | Proof of identity & residence | International travel and identity proof |
| Walk-in Accepted | Yes | No, online booking is mandatory |
| Online Booking Portal | uidai.gov.in | www.passportindia.gov.in/psp |
| Biometrics Collected | 10 fingerprints, iris scan, photo | 10 fingerprints, photo, digital signature |
| Documents Required | Proof of identity and address, like PAN card, passport, driver’s license, ration card, etc. Check the complete list of UIDAI accepted documents. | Proof of DOB, identity, address, and nationality, dependent on your category, applicable situation, and whether or not you’ve passed Class 10. Click here to know what documents you’ll need! |
| Police Verification | Not required | Required |
| Validity | Lifetime | 10 years |
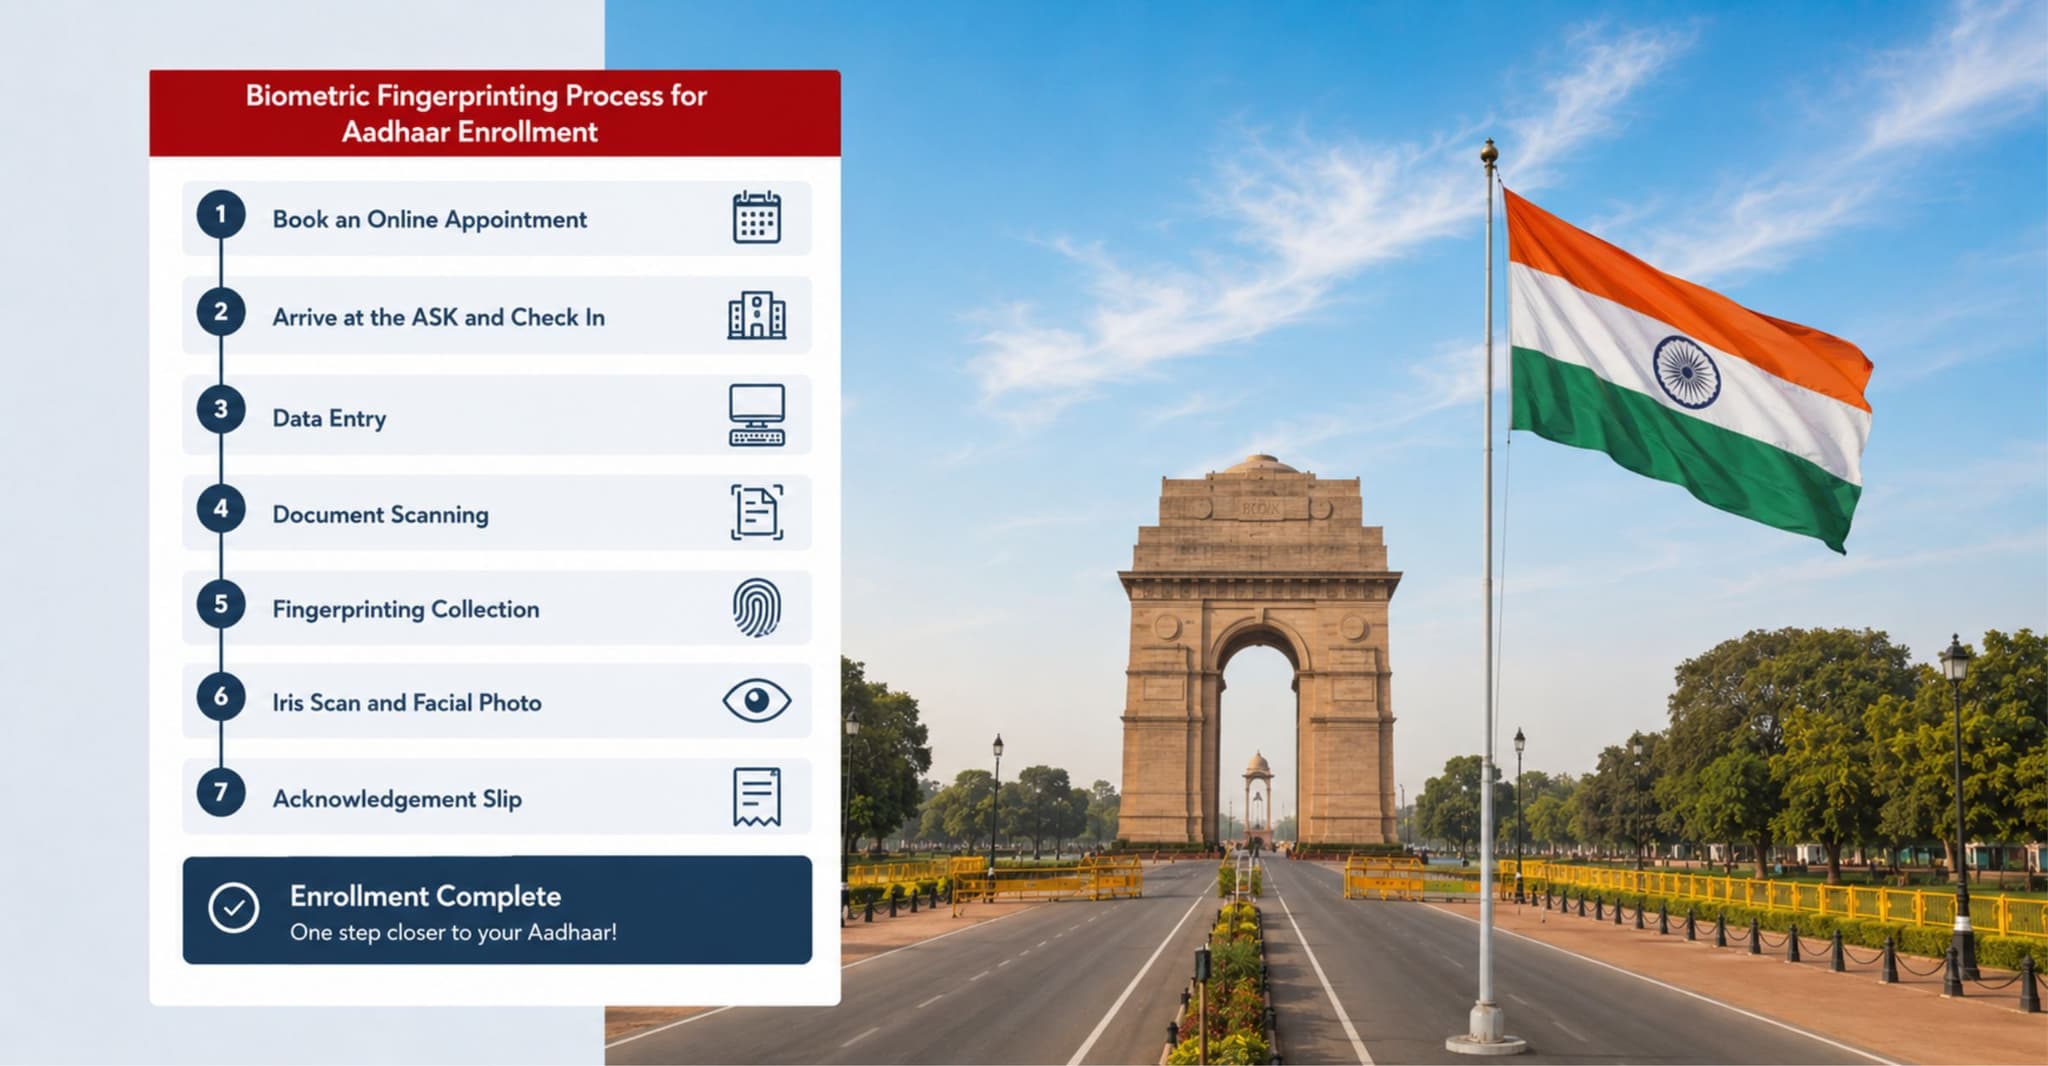
To make Aadhaar-related services easier for the public, UIDAI has opened dedicated service centres known as Aadhaar Seva Kendras (ASKs), where you can walk in for new enrollment or to update existing Aadhaar details.
ASKs are currently operational in 78 districts across India, complementing the 66,000+ existing Aadhaar centres already run by banks, post offices, BSNL, and state governments.
Step 1: Book an Online Appointment
You can easily book your appointment through the official UIDAI link bookappointment.uidai.gov.in. You'll be prompted to fill in your state, district, and nearest enrollment centre or ASK, preferred date and time, followed by personal details like name and mobile number. After you’re done, click on “confirm.” You'll receive an appointment confirmation SMS with a reference number.
Helpful Tip: Most ASKs and enrollment centres accept walk-ins, but you may have to wait. You'll be given a token number and served on a first-come, first-served basis after appointment holders. So, it’s best to make an online appointment.
Step 2: Arrive at the ASK and Check In
Arrive at the centre with your original documents and your appointment reference number. Show these at the reception counter, where you'll be issued a token number or directed to a queue.
Step 3 Data Entry
The operator will sit with you at a computer terminal and enter your name, address, gender, and date of birth into the software. You will be asked to review this on a secondary screen to ensure there are no spelling errors. Check this carefully.
Step 4 Document Scanning
The operator will then scan your original documents. They will hand them back to you immediately. Never give originals without getting them back.
Step 5: Fingerprinting Collection
You will place your 4 right-hand fingers (index, middle, ring, pinky) flat on the electronic scanner simultaneously, then your 4 left-hand fingers the same way, followed by both thumbs together. The machine captures a scan and shows a quality score. If quality is low, the operator will ask you to clean your hands and try again. The whole fingerprint process takes about 2–5 minutes
Step 6: Iris Scan and Facial Photo
Step 7: Acknowledgement Slip
At the end of the session, you will receive a slip containing your 14-digit Enrollment ID (EID). This is very important. Keep it safe. It's your only way to track your Aadhaar application until you receive your number.
After the process is done, your fingerprints and iris scans are sent to UIDAI's central database. The system compares your biometrics against every other person already in the system to ensure you aren't already enrolled. Your demographic data and documents are also verified. Once everything is cleared, your Aadhaar number is generated. You will receive an SMS notification.
You do not need to wait for the physical card to arrive by mail. Once your 12-digit Aadhaar number is generated, you can immediately download a digitally signed, universally valid e-Aadhaar online.
Special Cases in Aadhaar Biometric Enrollment
While the standard enrollment process works smoothly for most people, UIDAI has specific provisions for those who face certain difficulties during biometric capture. Some commonly seen exceptional cases are:
1. Elderly Individuals with Worn or Faded Fingerprints
Years of manual labor, age-related skin changes, or certain skin conditions can cause fingerprint ridges to flatten or fade over time, making them difficult for scanners to read. If the quality score remains low after multiple attempts, the operator can mark a biometric exception. In such cases, UIDAI's system allows enrollment to proceed using iris scans as the primary biometrics, with a note added to the record. The Aadhaar number is still issued.
2. Physically Challenged Individuals / Missing or Damaged Fingers
If a person is missing one or more fingers or even an entire hand due to a congenital condition, accident, or amputation, the operator has to take the biometrics as per the biometric exception guidelines of UIDAI.
3. Children Under 5 Years of Age
Children below the age of 5 are enrolled under a special category called Baal Aadhaar, issued as a blue-coloured card. Since young children's biometrics are not yet stable enough for reliable long-term identification, no fingerprints or iris scans are collected at the time of enrollment. Instead, the child's Aadhaar is biometrically linked to one parent's Aadhaar. When the child turns 5, and again at 15, they must visit an enrollment centre to provide and update their biometrics, so their record is updated with full biometric data.
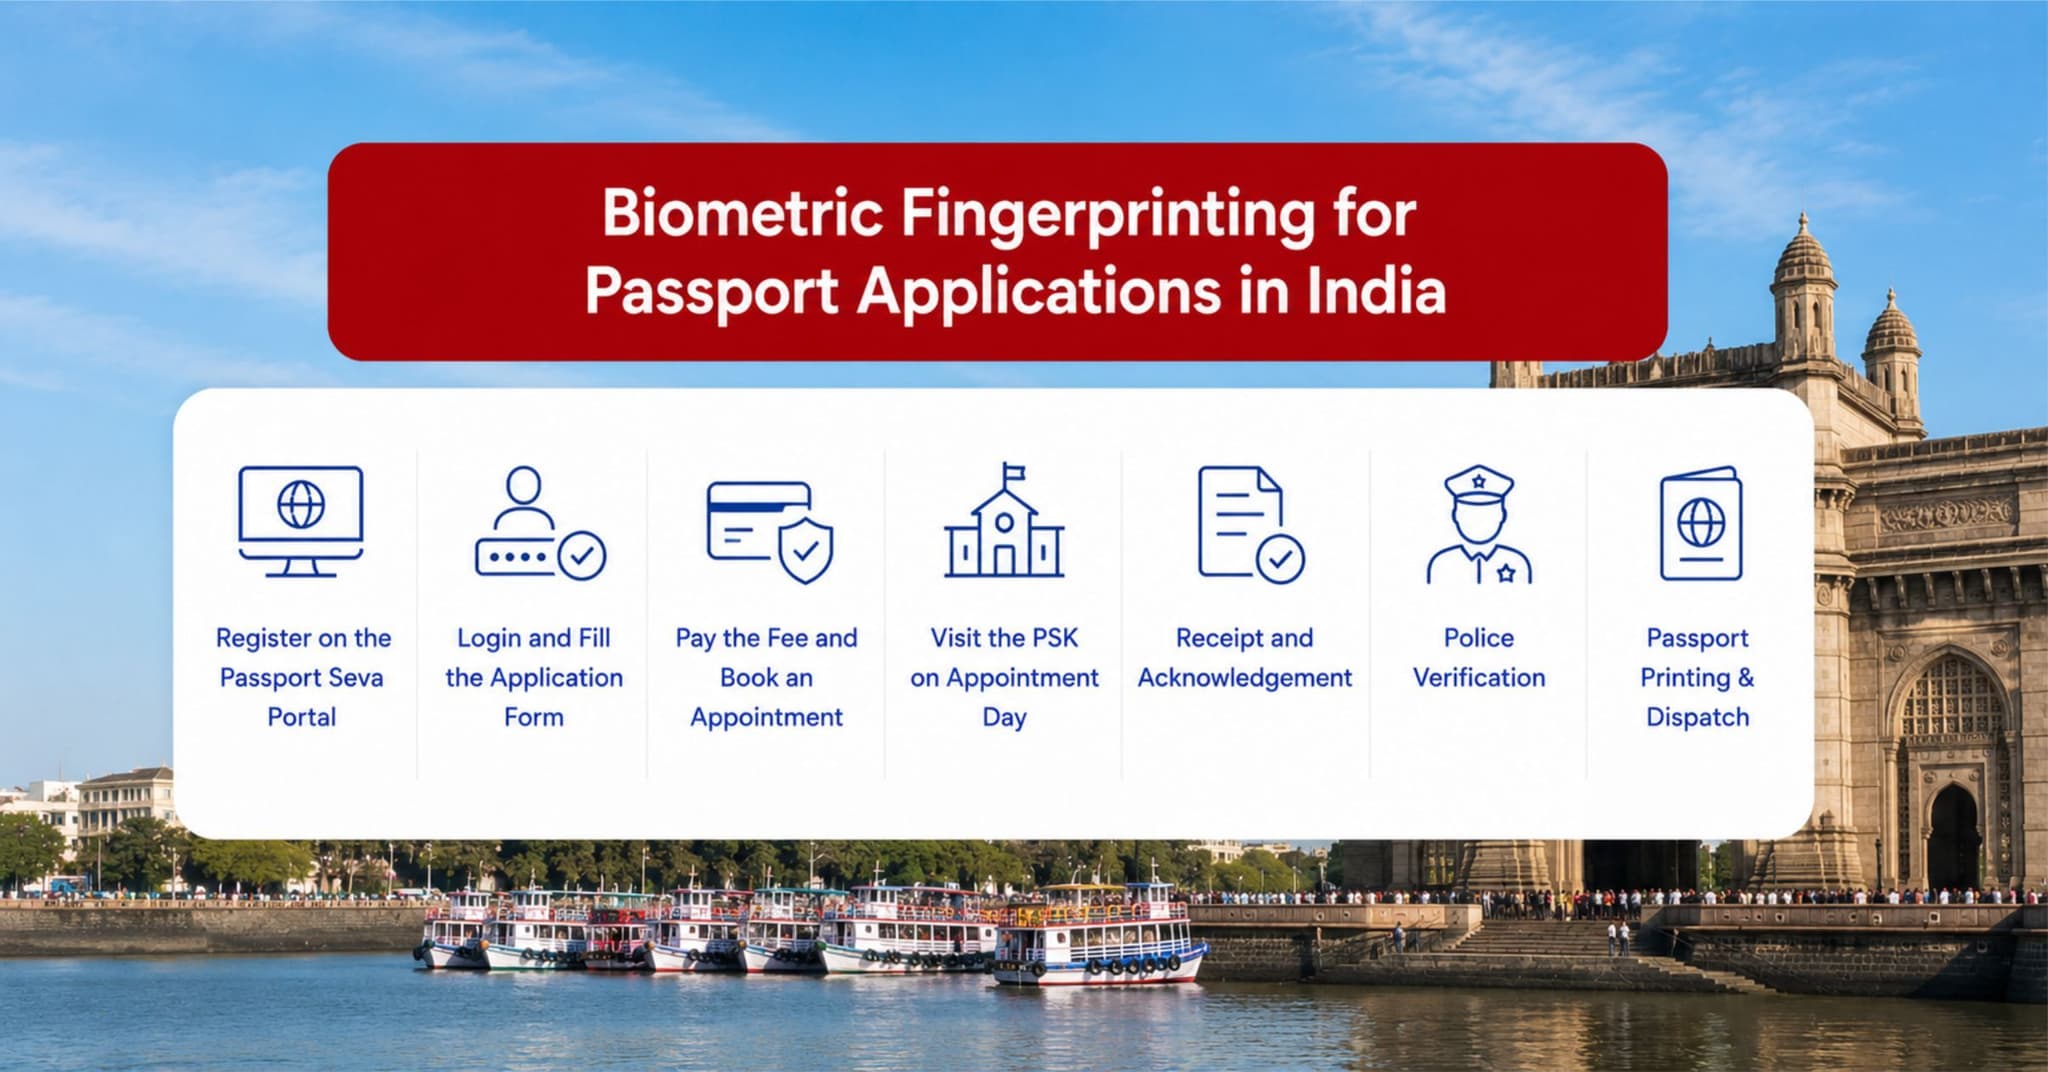
Passports in India are issued through a network of passport offices, Passport Seva Kendras (PSKs), and Post Office Passport Seva Kendras (POPSKs) across the country, all managed under the Passport Seva Portal. The entire process is digital, which means you must complete the registration and book an appointment online in advance. Walk-in applications are not accepted in this case.
Step 1: Register on the Passport Seva Portal
Go to www.passportindia.gov.in/psp and click on “Register” on the top navigation menu. After filling all the details, you’ll receive an email verification link. Click it to activate your account.
Step 2: Login and Fill the Application Form
Login using your credentials, and click on "Apply for Fresh Passport / Re-issue of Passport." You'll be taken to the online form, where you’ll have to fill in many details, such as name, DOB, gender, marital status, family details, current address, emergency contact, etc. Click "Submit."
You will receive an Application Reference Number (ARN). Save this.
Step 4: Pay the Fee and Book an Appointment
After submitting the form, you’ll be redirected to the payment gateway. Choose the desired method and complete the payment. After payment, go to "Schedule Appointment."
You have to select the RPO based on your current area of residence. Then you’ll be shown your nearest PSK. Choose the available date and time slot from the calendar and confirm the appointment.
You'll receive an appointment confirmation via email and SMS where the appointment date, time, location,and your ARM will be mentioned. Print it as you’ll have to carry it with you to the PSK
Step 5: Visit the PSK on Appointment Day
When you enter, you will have to visit multiple counters.
Counter A: The security will check your appointment letter and give you a token number. You have to wait in the waiting area. Keep an eye on the display screens for your token number to appear.
Counter B: An officer will verify all of your original documents and self-attested photocopies. If documents are in order, they will be accepted and scanned.
Counter C: This is the counter for biometric data collection.
What if fingerprints cannot be captured? If a person has a permanent medical condition, injury, worn ridges due to age or manual labor, or missing fingers, the officer will make multiple attempts using different fingers or hands first. If capture still fails, the officer marks a biometric exception directly in the system. The process continues using your photograph as the sole biometric, and the exception is noted in your passport file and on the embedded chip in your e-Passport. In cases of medical conditions or permanent physical exceptions, you will have to submit relevant medical records or certificates so the officer can verify and document your condition properly.
Counter D: A supervisor will conduct a final review of all the captured data and documents, to make sure everything is correct and in order.
Step 6: Receipt and Acknowledgement
At the final step, you will receive a printed receipt with your file number, expected processing timeline, status tracking instructions, and "Police Verification Required." The entire PSK visit usually takes 1.5 to 3 hours depending on the queue.
Step 7: Police Verification
Your application is then sent to the local police station of your residence. A local police officer first calls you to verify your address and background, and then will visit your registered address to make sure you actually live there and how your overall conduct has been. Be available at home. If you miss the visit, coordinate with the police station directly.
Step 8: Passport Printing & Dispatch
After the police verification is cleared, your e-passport will be dispatched via speed post to your address.
What is an e-Passport?
The e-Passport is like a smart passport that comes with built-in biometric technology and is part of the Government of India’s Passport Seva Programme (PSP) 2.0. Today, most new passports issued through PSKs are e-Passports. While it looks almost exactly like a regular passport from the outside, it has a small tamper-proof electronic chip and antenna securely embedded inside the cover or one of the pages.
This electronic chip safely stores your personal information, such as your name and date of birth, along with your biometric details like your fingerprints and digital photograph. The information stored on the chip is encrypted and protected against tampering.
The main purpose of this technology is to make passports much safer and harder to forge or tamper with. For example, if someone tries to change the printed information on the passport, the details will no longer match the encrypted information stored inside the chip. This immediately helps authorities identify the passport as altered or forged.
You can easily recognize an e-Passport by looking for a small gold-colored chip symbol printed on the front cover, usually below the word “Passport.”
Why it’s a big deal for travellers
Does Your Existing Passport Need to Be Replaced? No, you do not need to replace your existing passport if it is still valid. Your current passport remains completely valid until its expiry date. When you apply for a passport renewal or a fresh passport in the future, you will automatically receive an e-Passport as part of the new system.

